
Our CREAM project partners visited us at Labora to try out a selection of the various workshops we offer. One of the most open-ended workshops we lead is Experimenting with Photopolymer and the results from the CREAM visit provide a nice opportunity to share insights into the experimentation process. This post will explore some useful materials as well as some basic visual principles which can come into play but remember, the technical details below are only some of the potential ways in which you can work creatively with photopolymer. Come along, try it out yourself and discover new modes of experimentation!
Before Getting Started
The first thing to get to grips with when using photopolymer is reversal: black is white and backwards is forwards. Huh? Okay, one at a time…
Because photopolymer is processed using UV light exposure (link to previous post), a stencil is used to block certain areas from the UV light. This stencil (otherwise known as a ’separation’) is typically a black image on a transparent acetate sheet – and this is where the reversal comes in. Any part of the stencil which is black will block light, meaning the photopolymer plate will not be exposed and, later, will not be printed. Any part of the stencil which is transparent will allow the UV light to pass through, exposing and hardening the photopolymer plate, turning it into a relief surface which will hold ink and be printed. When preparing a stencil by hand, on a transparent acetate sheet, remember that any mark you make in black ink will NOT print. The areas of acetate sheet which you leave untouched WILL print (whether in black or in any other colour of printing ink you choose).
What about backwards being forwards? It may help you to understand this better if you hold both of your hands out in front of you, palms facing up. You can see that your right hand is a mirror image of your left hand. Now imagine your right hand is paper and your left hand is a printing plate. Place your right hand on top of your left and press. Notice that they fit – your paper thumb lines up with your plate thumb, as your paper pinkie matches your plate pinkie. (Hopefully you didn’t use a roller on your hands but if you did, you’d better go and scrub your inky pinkies…)
Mirror image is a basic principle of all printmaking which falls under the categories of relief printmaking, intaglio printmaking, and planographic printmaking. (With screenprinting, it’s a different story.) This is also one of the easiest principles of printing to forget and many a novice printer has lifted their first print to find in dismay that they forgot to reverse the text on their plate. Doh! So, remember, whether you are working with type or with photopolymer plates, compose and expose in mirror image.
Now for the nice (or confusing?) news – when making stencils by experimenting with transparent acetate sheets, backwards does not need to be forwards! If you prefer, you can create your image without mirroring it. This just means that, when it comes to exposing your stencil on your plate, you must flip the whole stencil, mirroring your image at this stage. Either way, make sure that your plate is backwards if you want your print to be forwards. Make sure your image is transparent if you want it to print.
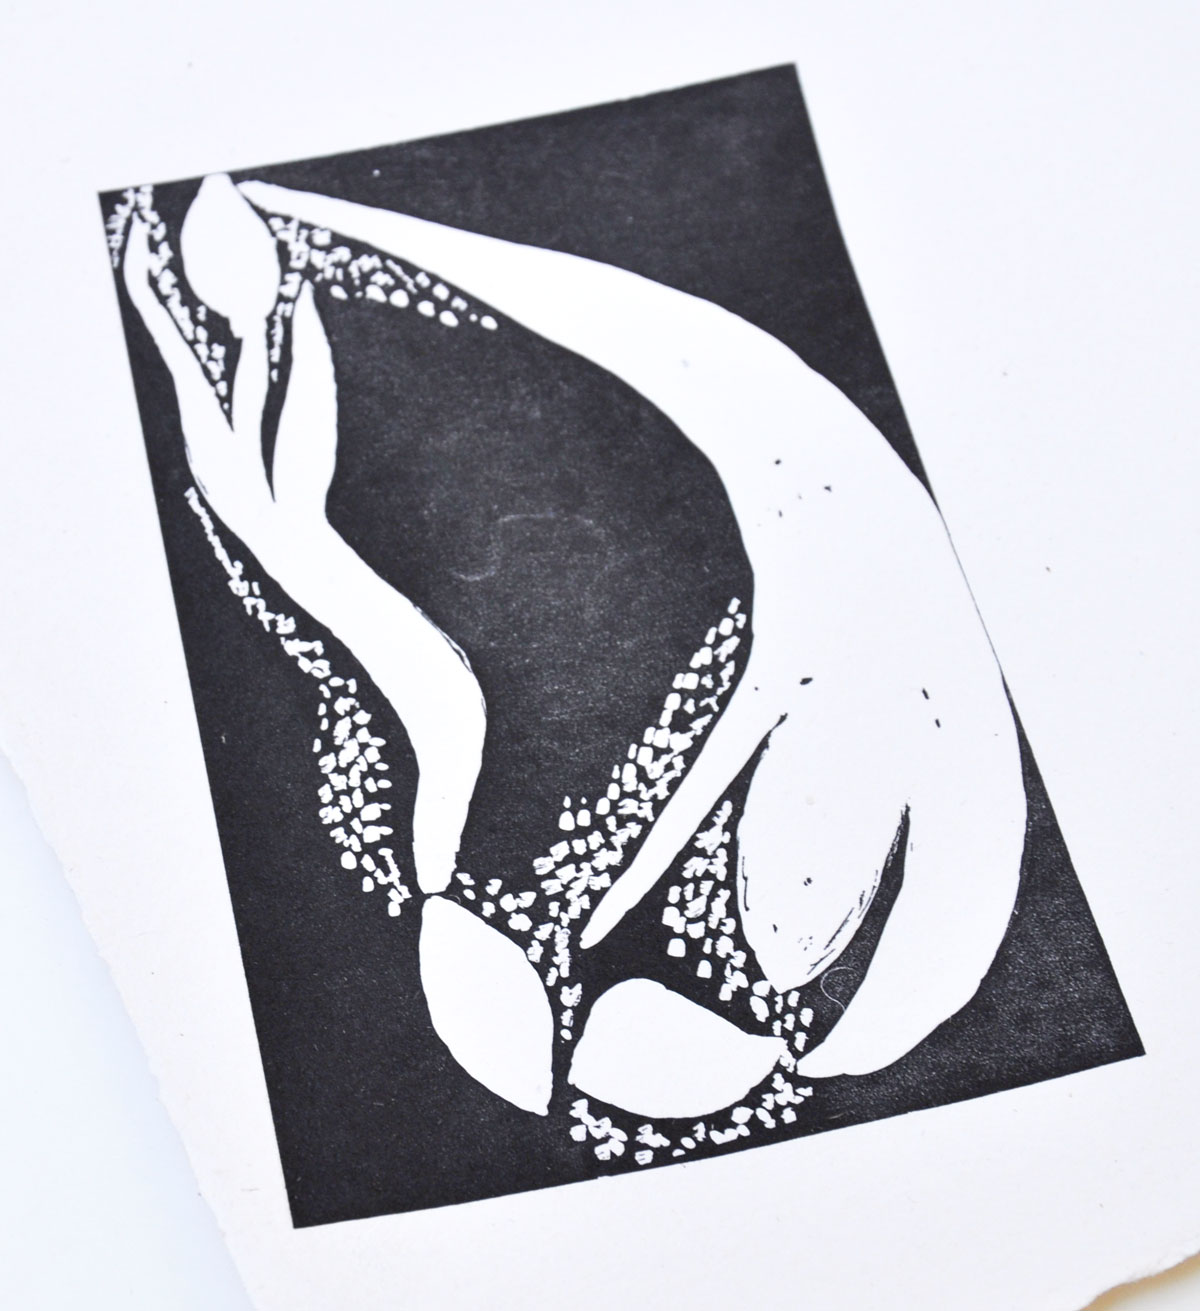
As a starting point for inspiration in our workshop, we each quickly wrote down a word which had stood out to us during the day – Innovation, Makers, Creativity, Paper, Type, Kids, Seeds, Technology… These words were all placed into and drawn out of a hat, swapping them around so that each person found themselves with a fresh, inspirational word. The task was to visually represent that word, using its sensation and characteristics as a style of drawing. With our words in front of us, we started making our stencils.
Materials
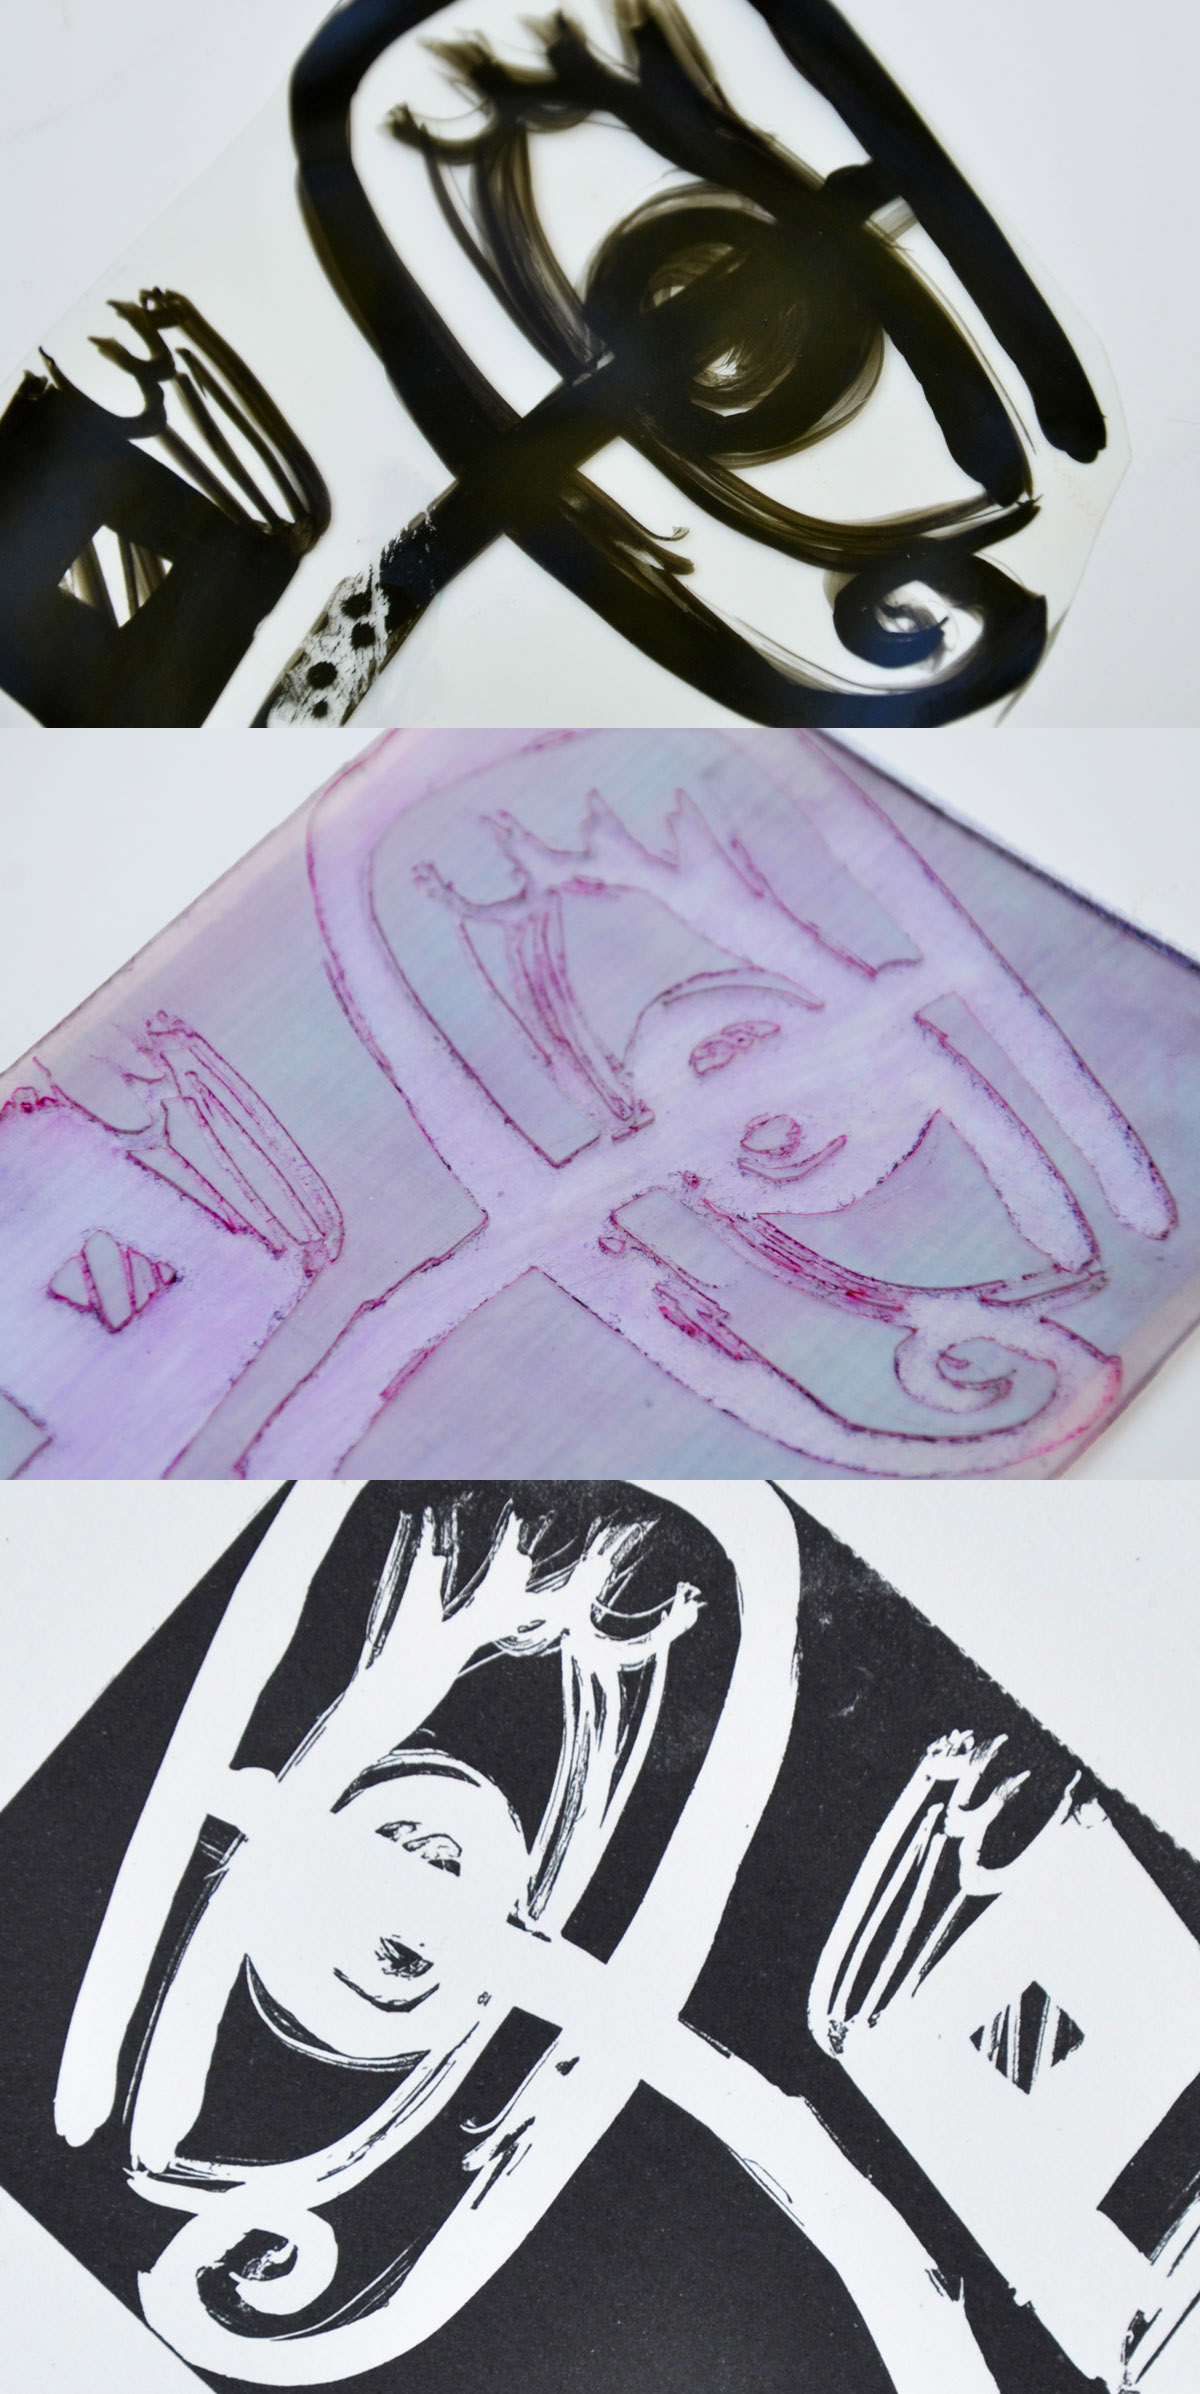
There are two main techniques to choose between when beginning to make your stencil – you can work from transparent to black (the stencil is made additively, the plate is made reductively), or from black to transparent (the stencil is made reductively, the plate is made additively). For this workshop, everyone chose to work from transparent to black. (Some examples of working from black to transparent will appear in the next section of this blog post – ‘Extra tricks’).
When starting with a transparent sheet and adding black, our favourite drawing materials are Indian ink and marker pens.
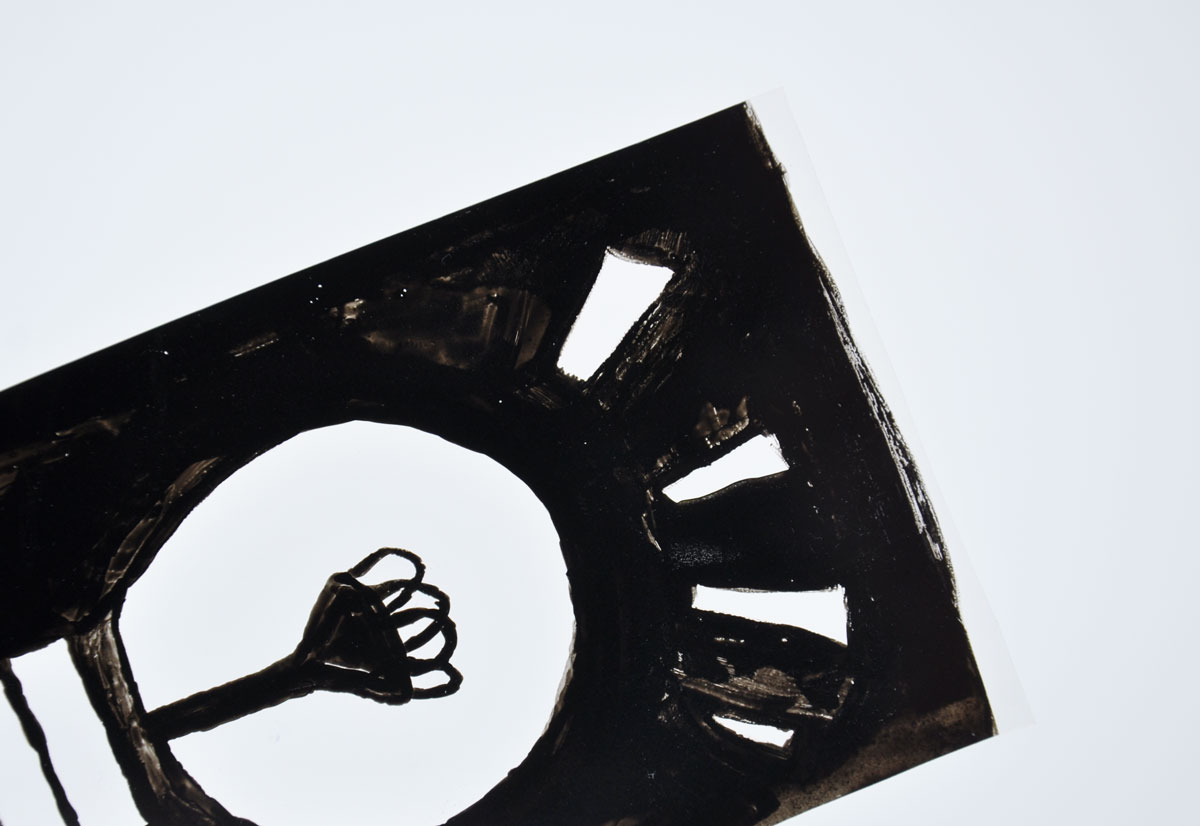
With Indian ink it’s easy to get a very solid black, which the UV light will not pass through. This is how Mark blocked out the background around his lightbulb stencil.
Indian Ink can also be great for playing around with semi-opacity. In the stencil made by Anna featuring the letter ’P’ for ’Paper’, you can see that she has drawn thickly with the ink in some places and thinly in others. This has led to some nice details in the final print, creating the illusion of fine, wispy eyelashes.
There’s a certain looseness which can come when working with Indian ink, which often results in very dynamic images. Maria splattered and sprayed ink onto her sheet of acetate. The word she was working with was ’Kids’ and this technique of stencil making certainly carried through to make a playful, energetic and messy print. She later added an extra feeling of kiddishness by printing her plate in colour – one side of the roller held purple ink, the other held red, and the two colours merged in the centre.


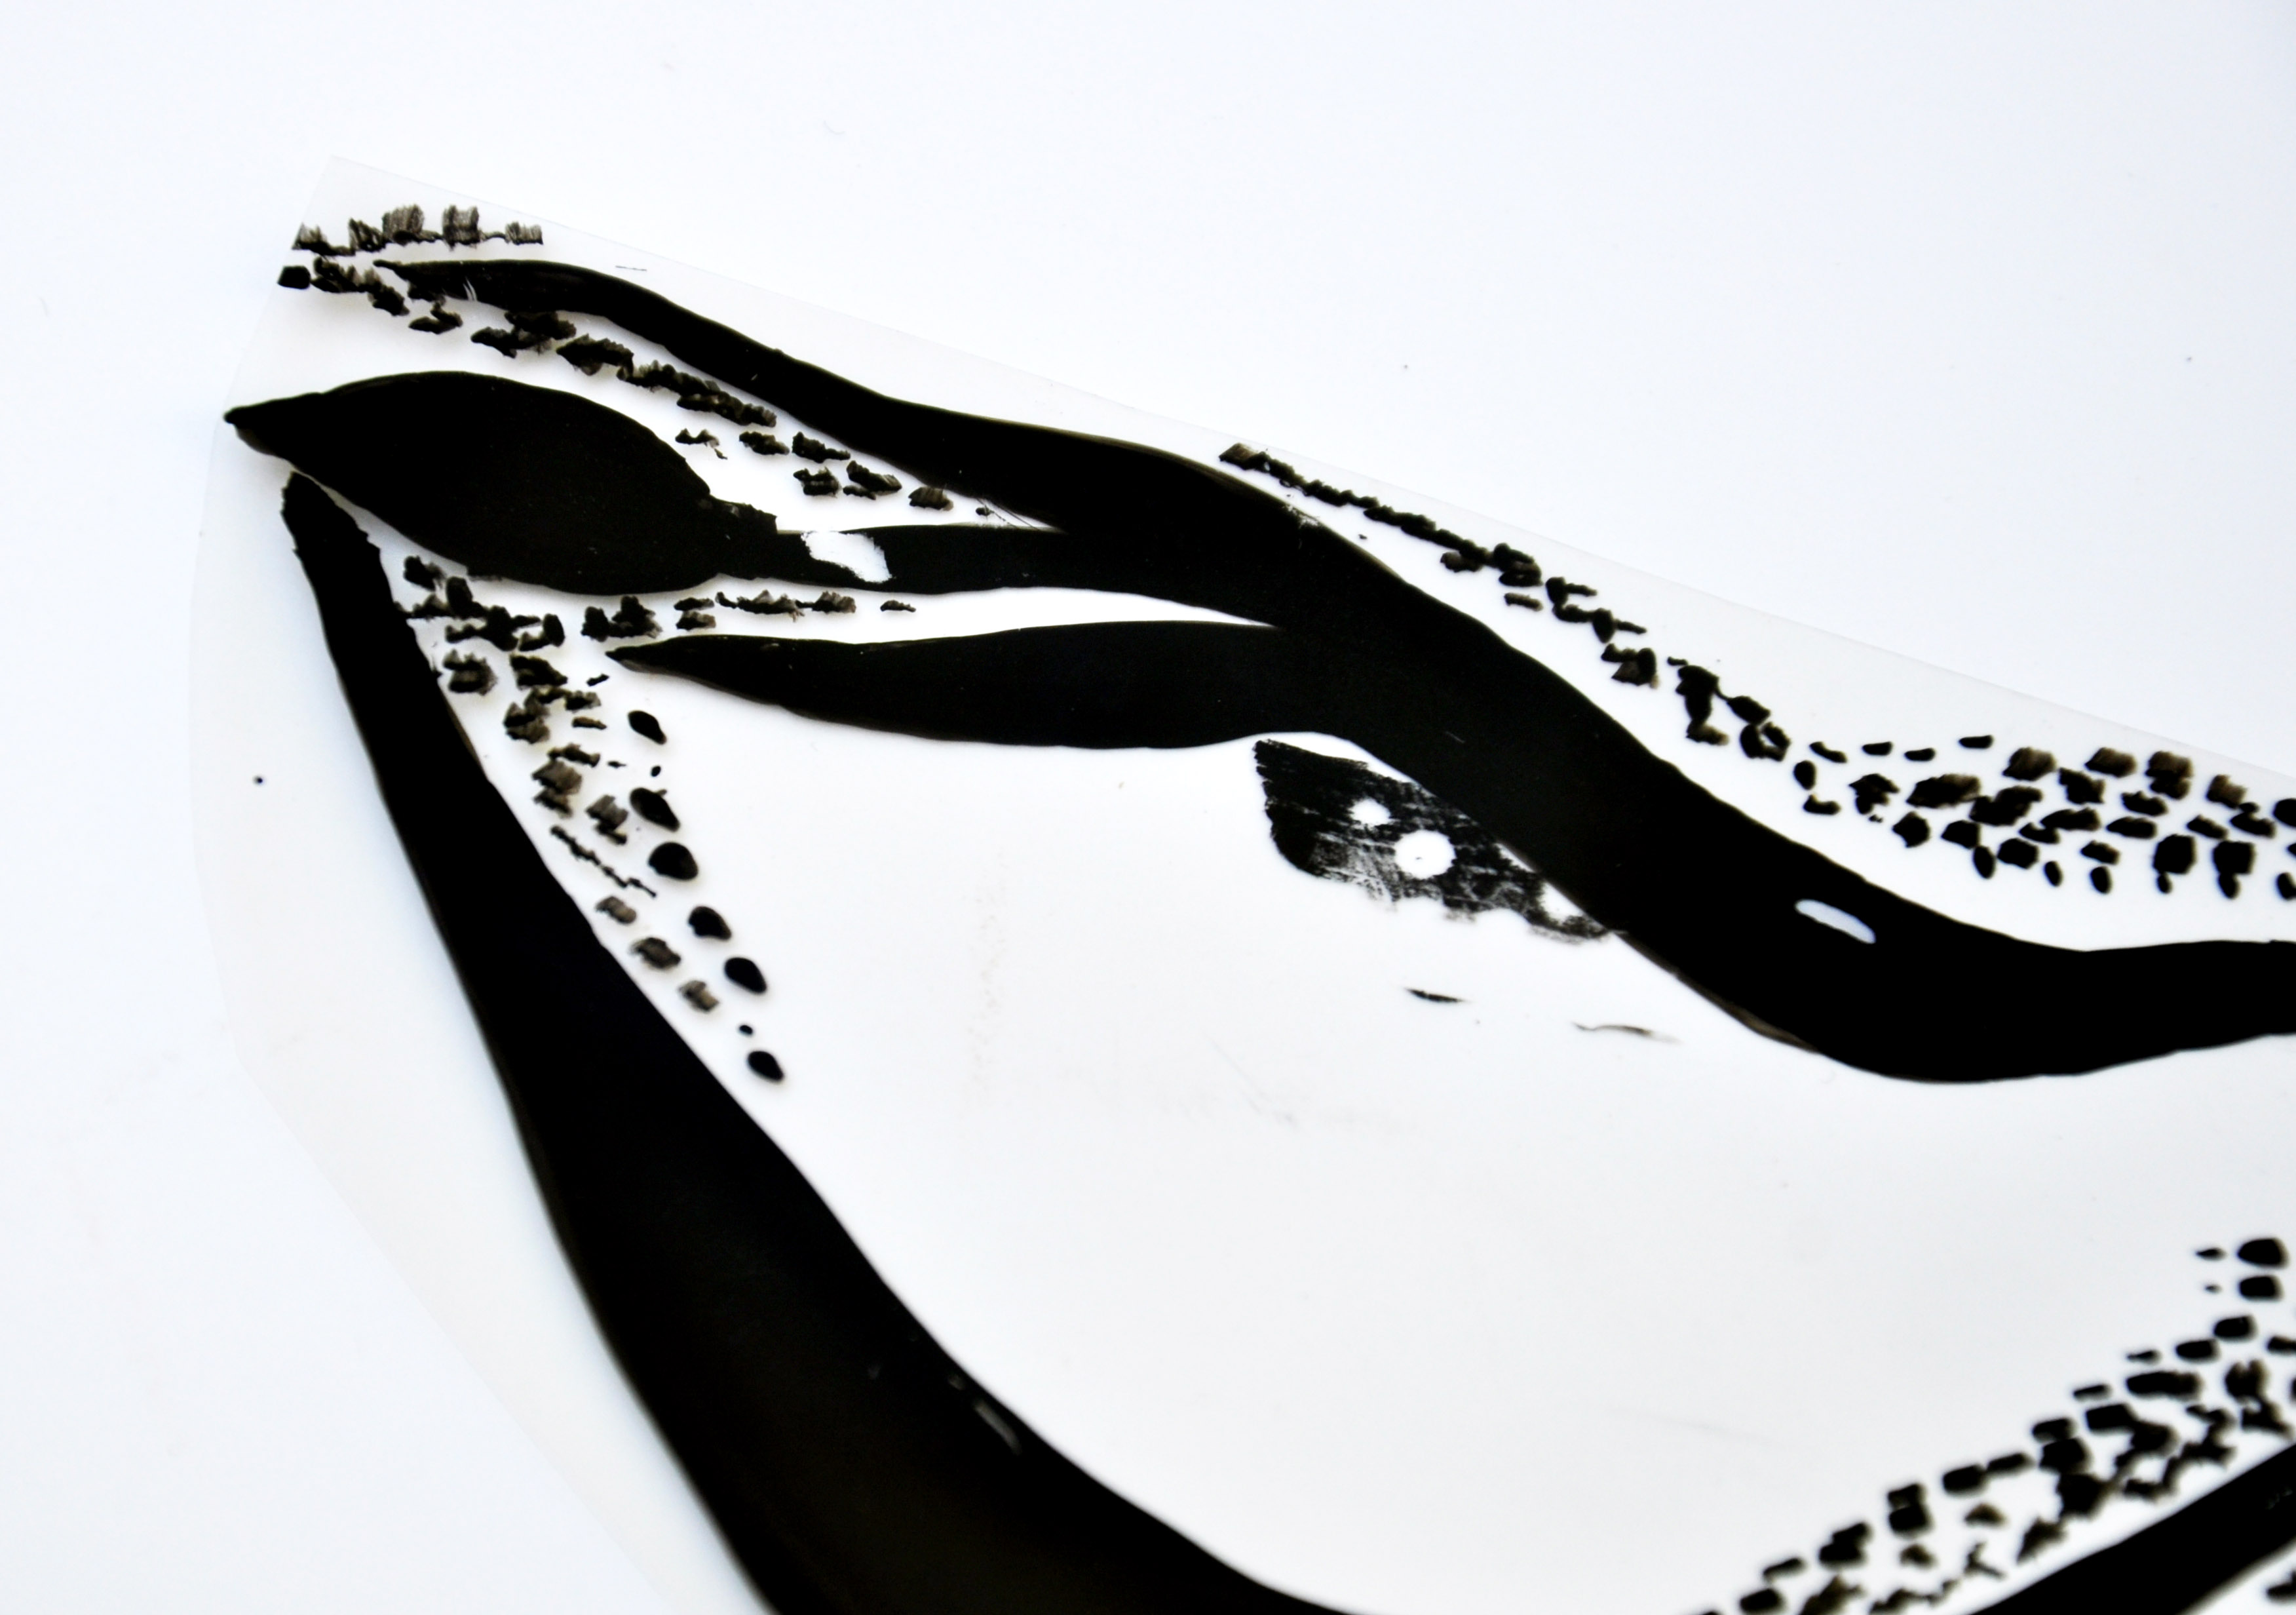
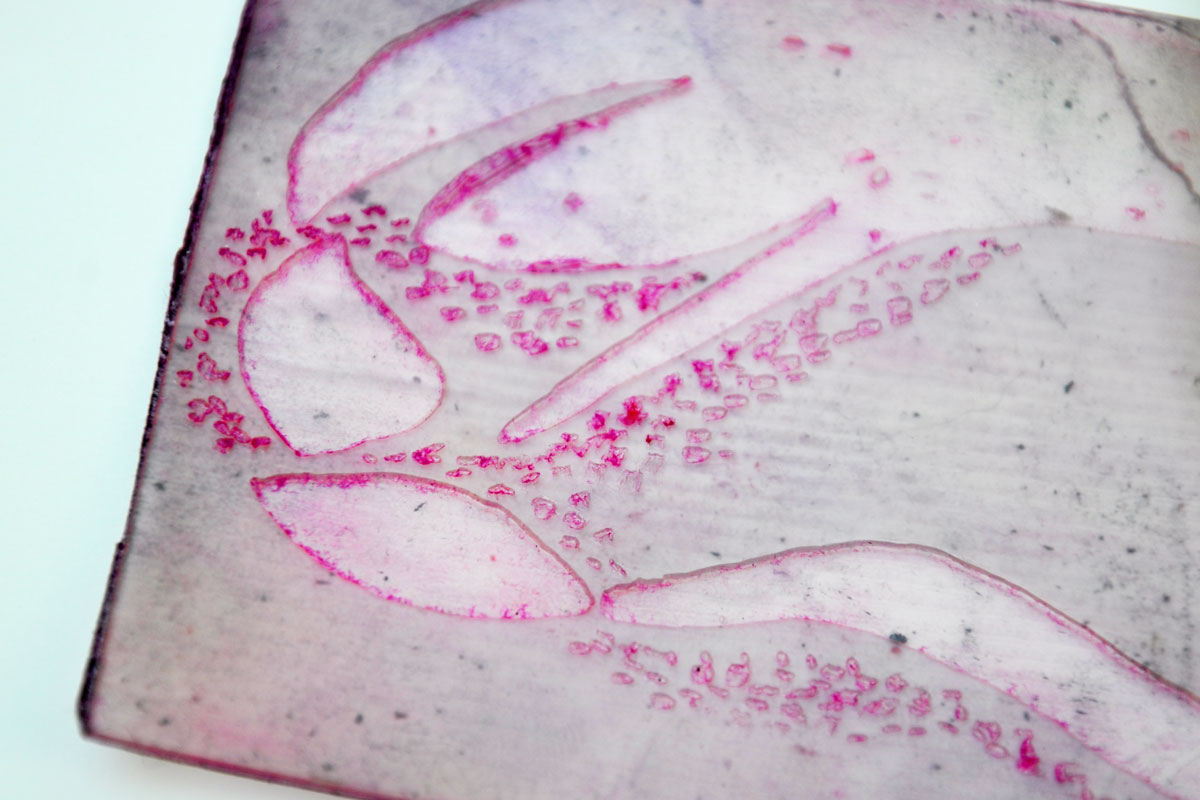
When drawing up stencils with Indian ink it’s also possible to add more deliberate, considered marks to the image. Carla made the letter ’D’ taken from the word ’Seeds’ and by gently dotting her transparent acetate sheet with black ink she created sections on her plate which printed with subtle variety.
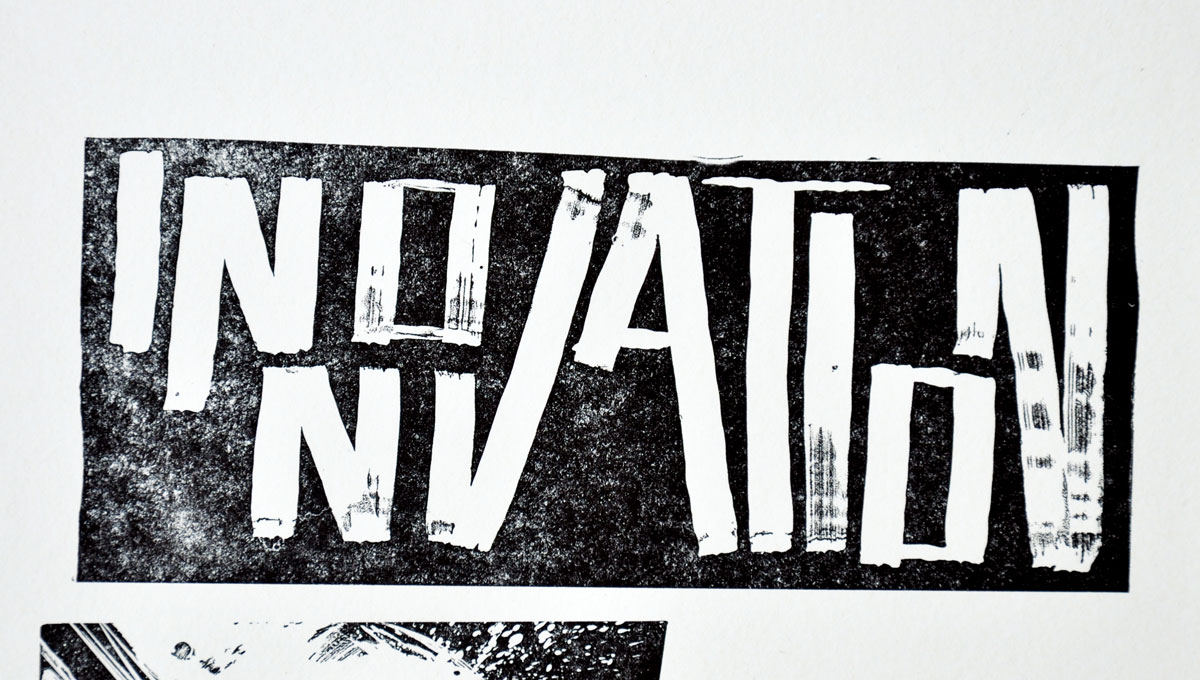
The other material we often use when working from transparent to black is marker pens. For a very solid black, we recommend Derwent Graphik Line Painter pens, which fully block the light, but a regular permanent marker has its own charm. You can see from the print below, that the regular marker didn’t cover the acetate 100% in the intended areas but rather broke down, allowing small streaks of UV light to pass through during the process of exposure. This is the reason for the interesting black marks on the white word ’Innovation’. Whilst the breaking down of the marker pen is rather unpredictable, it is possible to use this unpredictability to create unusual, unexpected details in your work.
Extra tricks
There are more techniques of experimenting with photopolymer, which have been used in previous workshops but which we didn’t get around to trying out with our CREAM project partners. Here are three favourite examples:
- Blocking the light with objects
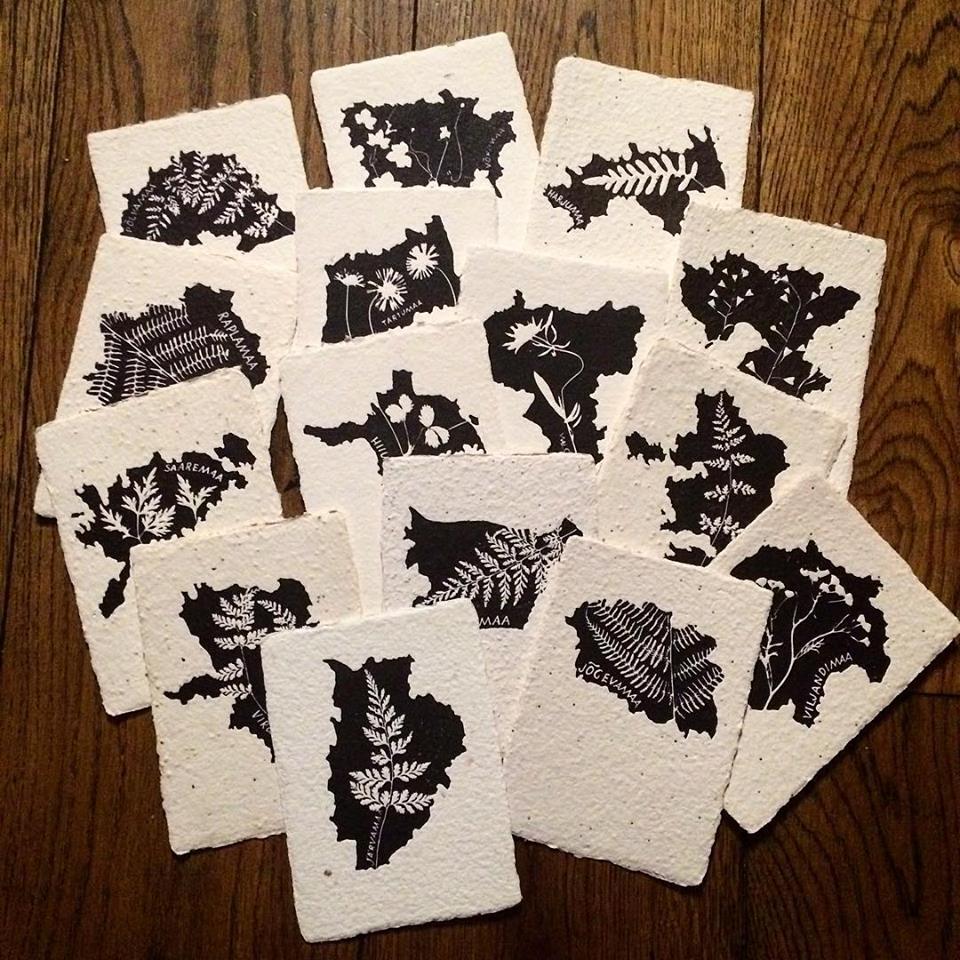
Alexander Vasin and his wife Natalia were here in January with a group of students and they, too, did the Experimenting with Photopolymer workshop. In the evenings, whilst the students were out exploring the city, Natalia worked away in our workshop on her own personal project – a photopolymer plate for each county in Estonia. She found a novel way of breaking up the graphic form of each county’s landmass with the organic shape of a flower or plant. She glued these natural objects directly onto the stencil and found that they too blocked the UV light, exposing their shape onto her photopolymer plates.

- Drawing directly onto the photopolymer
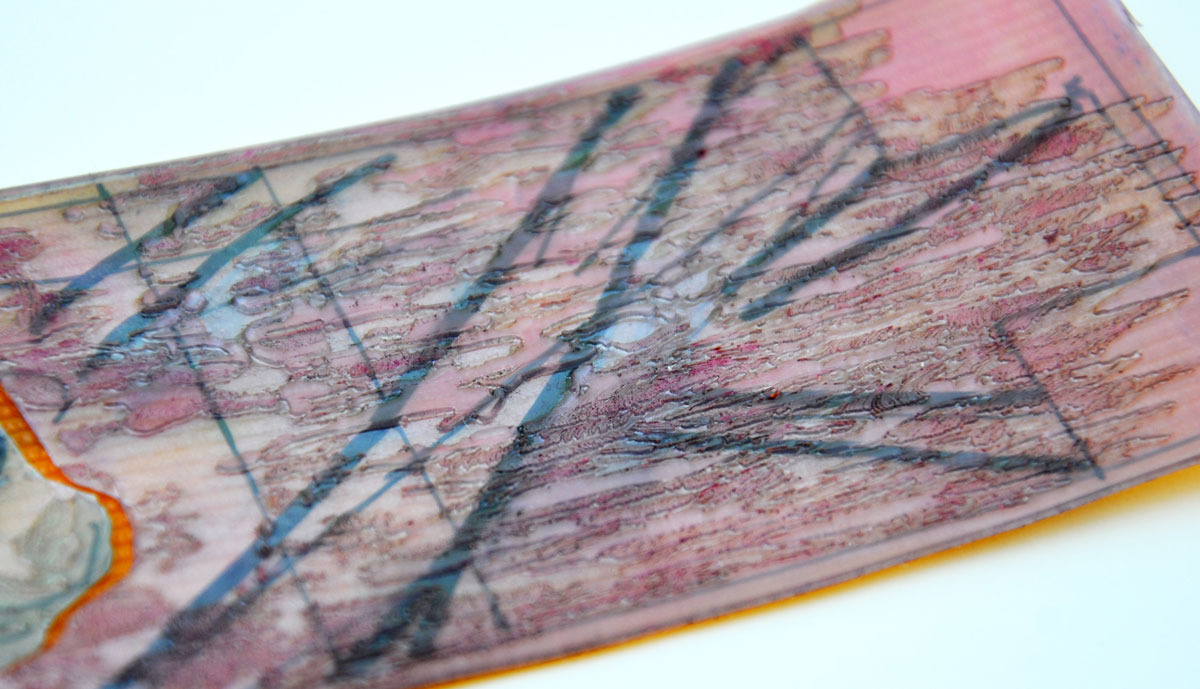
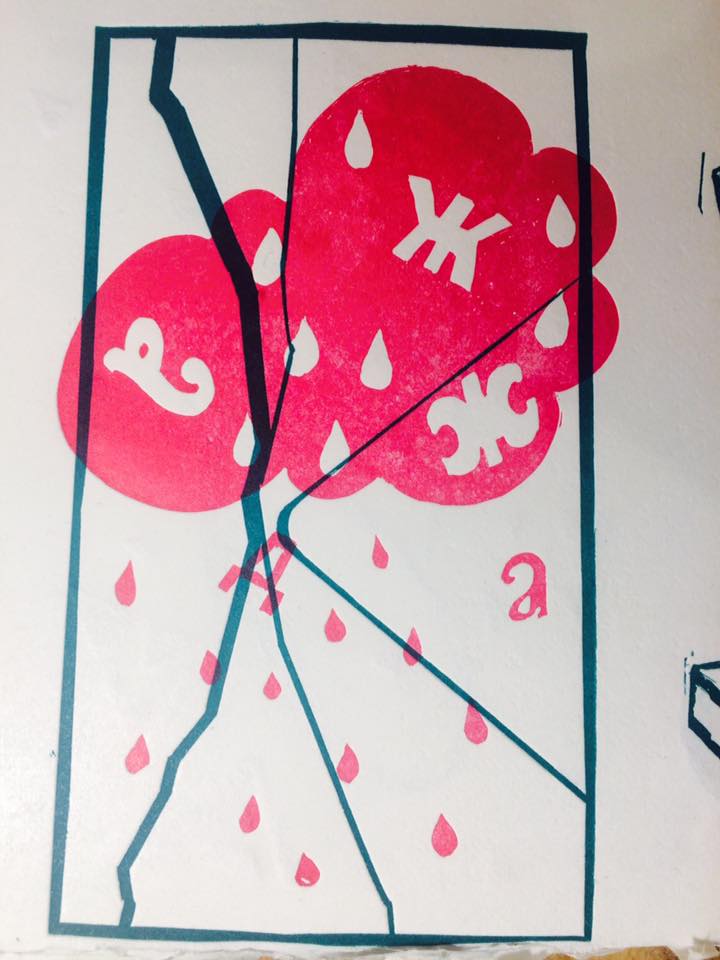
Another method which appeared during Alexander Vasin’s workshop was drawing directly onto the photopolymer, with Indian ink and with marker. For this, the step of making a stencil is skipped altogether. The protective film covering the photopolymer plate is removed and black marks are made straight onto the unexposed plate. It is then exposed and washed out as normal. What we discovered through this process is that the marker pen breaks down even more severely, leading to a dynamic and unexpected result. What’s more, the Indian ink, when applied with a brush directly onto the unexposed plate, also breaks down, spreading, cracking, and resulting in a very painterly plate. I tried this out myself for the cassette cover design for the band adhesion’s debut release, ’MONOMERS | OLIGOMERS’.

- Cutting and scratching – from black to transparent
As previously mentioned, it is also possible, when making a stencil, to begin with black and remove parts of the stencil to reveal transparent marks or sections. This technique was used a lot during Brody Neuenschwander’s workshop, last year in August.
Begin with a sheet of acetate that is printed solid black and cut a shape out from its centre. The part you cut away will print, whilst the surrounding black of the image will not print, revealing the paper. For intricate details, don’t cut a shape out but simply scratch at the layer of black ink covering the acetate sheet.

Nestor cut different shapes out from a sheet of black paper and taped them together with gaps between. The gaps are what printed.
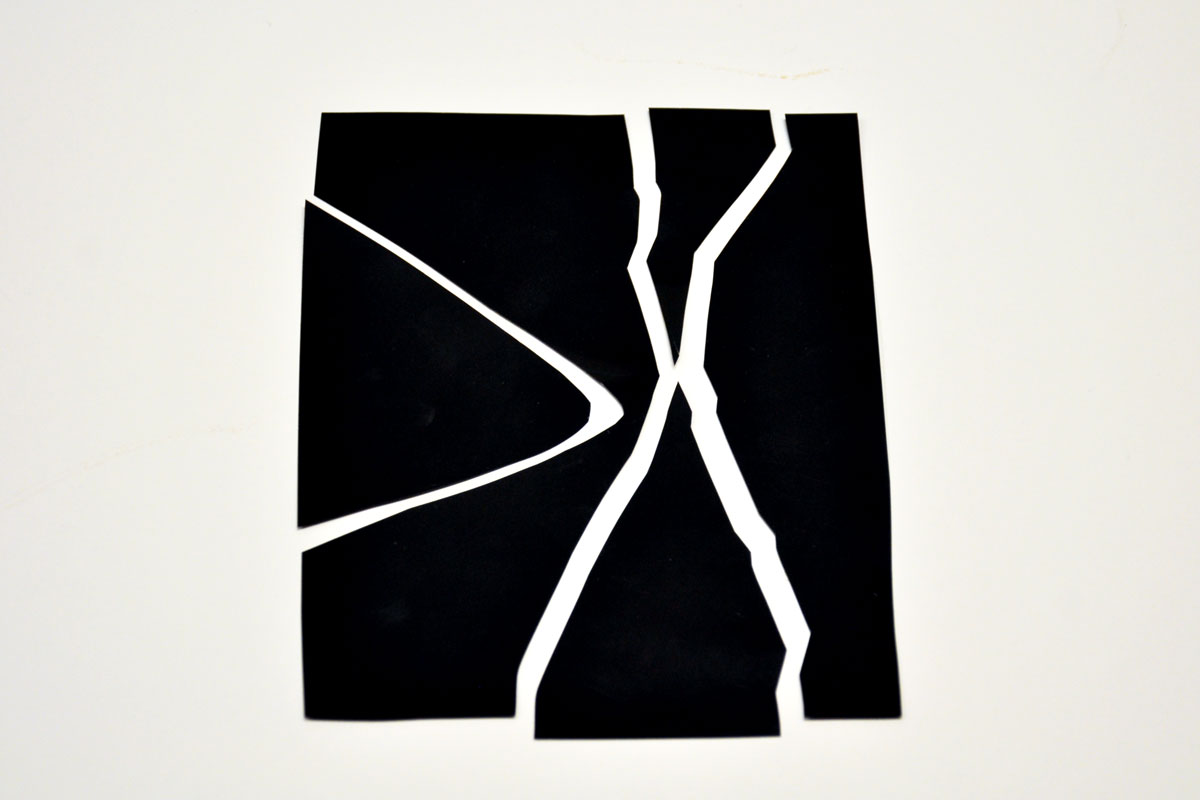
When you really get into cutting and pasting transparent acetate sheets and black paper, you can find yourself working interchangeably from transparent to black, and from black to transparent, layering up positive and negative until you have a complex, intricate balance between the two. The prints which were made during Brody Neuenschwander’s workshop hurtle between the negative and the positive image, playfully wrestling with a defining characteristic of monochromatic photopolymer printing.
Experimenting with Photopolymer is one of many workshops in development by Labora through the CREAM: Creative Makers project, in collaboration with the National Print Museum (IE), Explora (IT), and Neapolis (ES), and co-funded by the Creative Europe Programme of the European Union. The results of the CREAM project will be presented publicly at the grand opening of our new Children’s Fab Lab in Tallinn, on 12th Jaunary 2019. If you are interested in booking the Experimenting with Photopolymer workshop before then, get into touch with us at info@labora.ee.